
Introduction
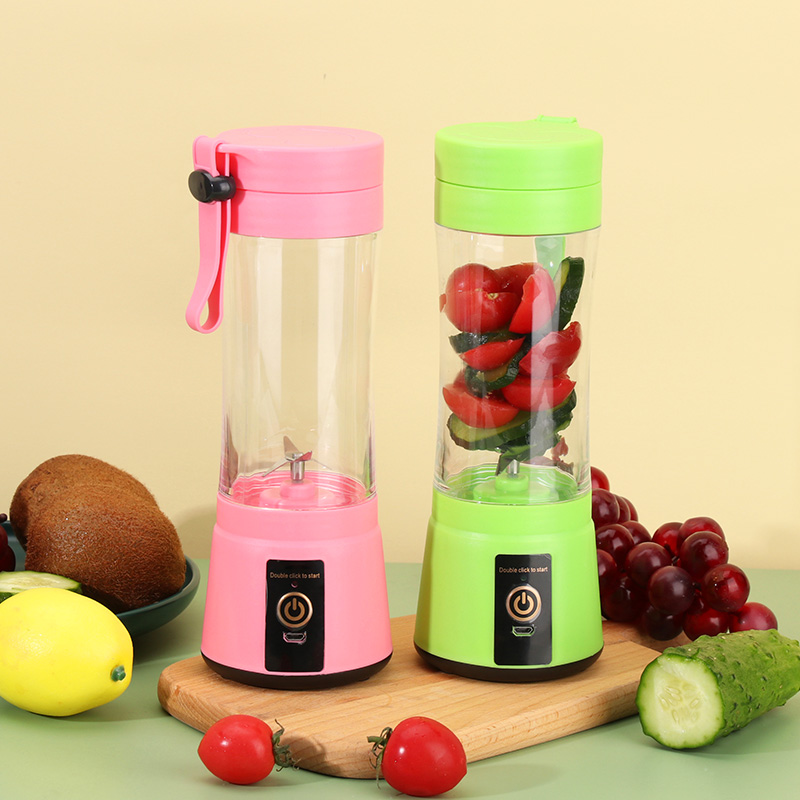
A fruit blender is a versatile and essential kitchen appliance that allows you to create delicious and nutritious smoothies and other blended recipes. However, to maintain its performance and ensure food safety, it is crucial to clean your blender properly after each use. In this essay, we will discuss the best practices for cleaning a fruit blender, covering various subheadings such as disassembly, pre-cleaning steps, cleaning methods, and maintenance tips. By following these guidelines, you can keep your blender in optimal condition, prevent the buildup of residue, and enjoy safe and healthy blending experiences.
Disassembly
Before cleaning your fruit blender, it is important to disassemble it properly. Follow these steps:
a. Unplug the Blender: Ensure that the blender is unplugged from the power source to avoid any accidents during the cleaning process.
b. Remove the Blender Jar: Detach the blender jar from the base by twisting it counterclockwise or following the instructions specific to your blender model.
c. Separate the Blade Assembly: In most blenders, the blade assembly is removable. Carefully unscrew or unclip the blade assembly from the bottom of the blender jar. Be cautious as the blades are sharp.
Pre-Cleaning Steps
To make the cleaning process more efficient, consider the following pre-cleaning steps:
a. Rinse Immediately: After using the blender, rinse the blender jar, blade assembly, and any other detachable parts with warm water immediately. This helps prevent food residue from drying and sticking, making it easier to clean later.
b. Dislodge Stuck Residue: If there is any stubborn residue stuck on the blade assembly or blender jar, use a soft brush or sponge to dislodge it gently. Avoid using abrasive materials that may scratch the blender’s surfaces.
c. Check for Safety Precautions: Some blender models have specific safety features or guidelines for cleaning. Refer to the user manual to ensure you follow any manufacturer-recommended steps or precautions.
Cleaning Methods
When it comes to cleaning your fruit blender, there are several effective methods you can choose from:
a. Hand Washing: The most common method is to wash the blender parts by hand. Use warm water and a mild dishwashing detergent. Gently scrub the blender jar, blade assembly, and any other detachable parts with a sponge or brush. Pay special attention to the blade assembly and any crevices where food particles may accumulate. Rinse thoroughly with warm water to remove any soap residue.
b. Dishwasher Cleaning: Check if your blender parts are dishwasher-safe. If they are, you can place them on the top rack of your dishwasher for a convenient cleaning option. However, be cautious with delicate or non-dishwasher-safe parts, such as gaskets or rubber seals, as high heat or strong detergents may damage them. Always refer to the manufacturer’s instructions for dishwasher suitability.
c. Blend with Cleaning Solution: For a thorough cleaning, you can blend a mixture of warm water and dishwashing detergent or a vinegar-water solution. Fill the blender jar with the cleaning solution, ensuring it covers the blades. Secure the lid tightly and blend on a low setting for a short period. This helps dislodge any residue or stains. After blending, empty the solution and rinse the blender jar and blade assembly thoroughly.
Maintenance Tips
To keep your fruit blender in optimal condition and extend its lifespan, consider the following maintenance tips:
a. Regular Cleaning: Make it a habit to clean your blender after each use. This prevents the buildup of residue and ensures that your blender is always ready for the next blending session.
b. Drying and Storage: After cleaning, allow all the blender parts to dry completely before reassembling or storing them. This helps prevent the growth of mold or bacteria. Ensure that the blender jar is stored upright to avoid any deformation or damage.
c. Deep Cleaning: Periodically, perform a deep cleaning of your blender by removing any accumulated residue or stains. Use a mixture of baking soda and water or specialized blender cleaning solutions to tackle tough stains. Follow the manufacturer’s instructions for deep cleaning or consult the user manual for specific guidance.
d. Blade Maintenance: Check the blades regularly for any signs of wear or damage. If the blades become dull or bent, it may affect the blender’s performance. Consult the manufacturer or a professional for blade replacement if needed.
Conclusion
Cleaning your fruit blender is an essential step in maintaining its performance, ensuring food safety, and prolonging its lifespan. By following the proper disassembly steps, pre-cleaning procedures, and choosing suitable cleaning methods, you can effectively remove residue and maintain a hygienic blending environment. Furthermore, incorporating regular maintenance habits such as drying and proper storage, deep cleaning when necessary, and monitoring blade condition will help you enjoy safe and efficient blending experiences for years to come. With these best practices, you can keep your fruit blender in optimal condition, ensuring both hygiene and longevity.